Posts in Easy Recipe
Caprese Baked Chicken

You may be familiar with the simple Italian salad, Caprese salad. It is a delicious arrangement of fresh sliced mozzarella, tomatoes, and sweet basil, seasoned with salt and olive oil. Perfect for a hot summer lunch or dinner on the back porch. But those flavors work well together in other recipes, too.

The simplicity of this recipe is reason enough to try it, but I’m convinced you’ll enjoy the combination of flavors with your basic baked chicken. The name brands shown are the ones I picked up in Walmart; this is not a paid advertisement. Feel free to sub brands for your favorite, or make a pesto from scratch (you overachiever).

IMG_4639.jpg

All you need to pull off the caprese baked chicken is several boneless skinless chicken breasts, sliced mozzarella, basil pesto, and fresh tomato.

I added the quinoa to the photo because it compliments the flavors in the chicken, plus it is a new find at the grocery store that got me excited.

When purchasing a chicken breast, I prefer to go with the thinly sliced. It is immediate portion control, and it cooks faster. Win-Win! You can certainly use a thicker chicken breast, note that the cooking time will be longer.

Get this party started by arranging your chicken in a baking dish and sprinkle with salt and pepper.

IMG_4642.jpg

Be mindful of your portion size of pesto. It is typically an olive oil based product, meaning it can be high in fat in small amounts. On the label of this basil pesto, it showed 1/4 cup equaled 35 grams of fat. Oh my!

I used about a tablespoon per chicken breast. The good news is that once the baking starts, a majority will cook off and to the sides becoming more of a flavoring agent, and not a caked on fat.

IMG_4644.jpg

After you slather on the pesto, it’s time to add the fresh mozzarella. Buying your mozzarella already pre-sliced will come in handy. If not, you will need to slice it. I assume you could use shredded mozzarella the same, sprinkle enough on to cover the chicken.

IMG_4646.jpg

Finally, slice a-good-ole Mississippi tomato and add it to the top of each chicken breast.

Pre-heat your oven to 350F.

Bake for 17-22 minutes for thinly sliced chicken breast.

You may need to bake for 25-30 if you opt for a thicker chicken breast.

Your chicken is ready when it reaches an internal temp of 165F.

IMG_4649.jpg

Look how melty and amazing!

See, don’t fret over the fat content.

Most of it will melt off and away, leaving juicy and delicious chicken.

The tomato isn’t just for looks. It is quite tasty!

Pair it with a whole grain, over pasta, or on toasted bread.

Below, this meal rates right with a protein, carbohydrate, vegetable, dairy, and healthy fat!

IMG_4657.jpg
Sheet Pan Pork Chops and Potatoes

I’m kicking myself for not taking more photos of this recipe. I honestly didn’t have high hopes for this one and was tired at the time. Figured, I’d skip documenting our dinner for the night. Boy, did I miss an excellent opportunity on an outstanding dish!

I thought about waiting till I made this recipe again to share it with you, but that didn’t seem fair either. You are going to want to go ahead and add this into your rotation of easy weeknight meals.

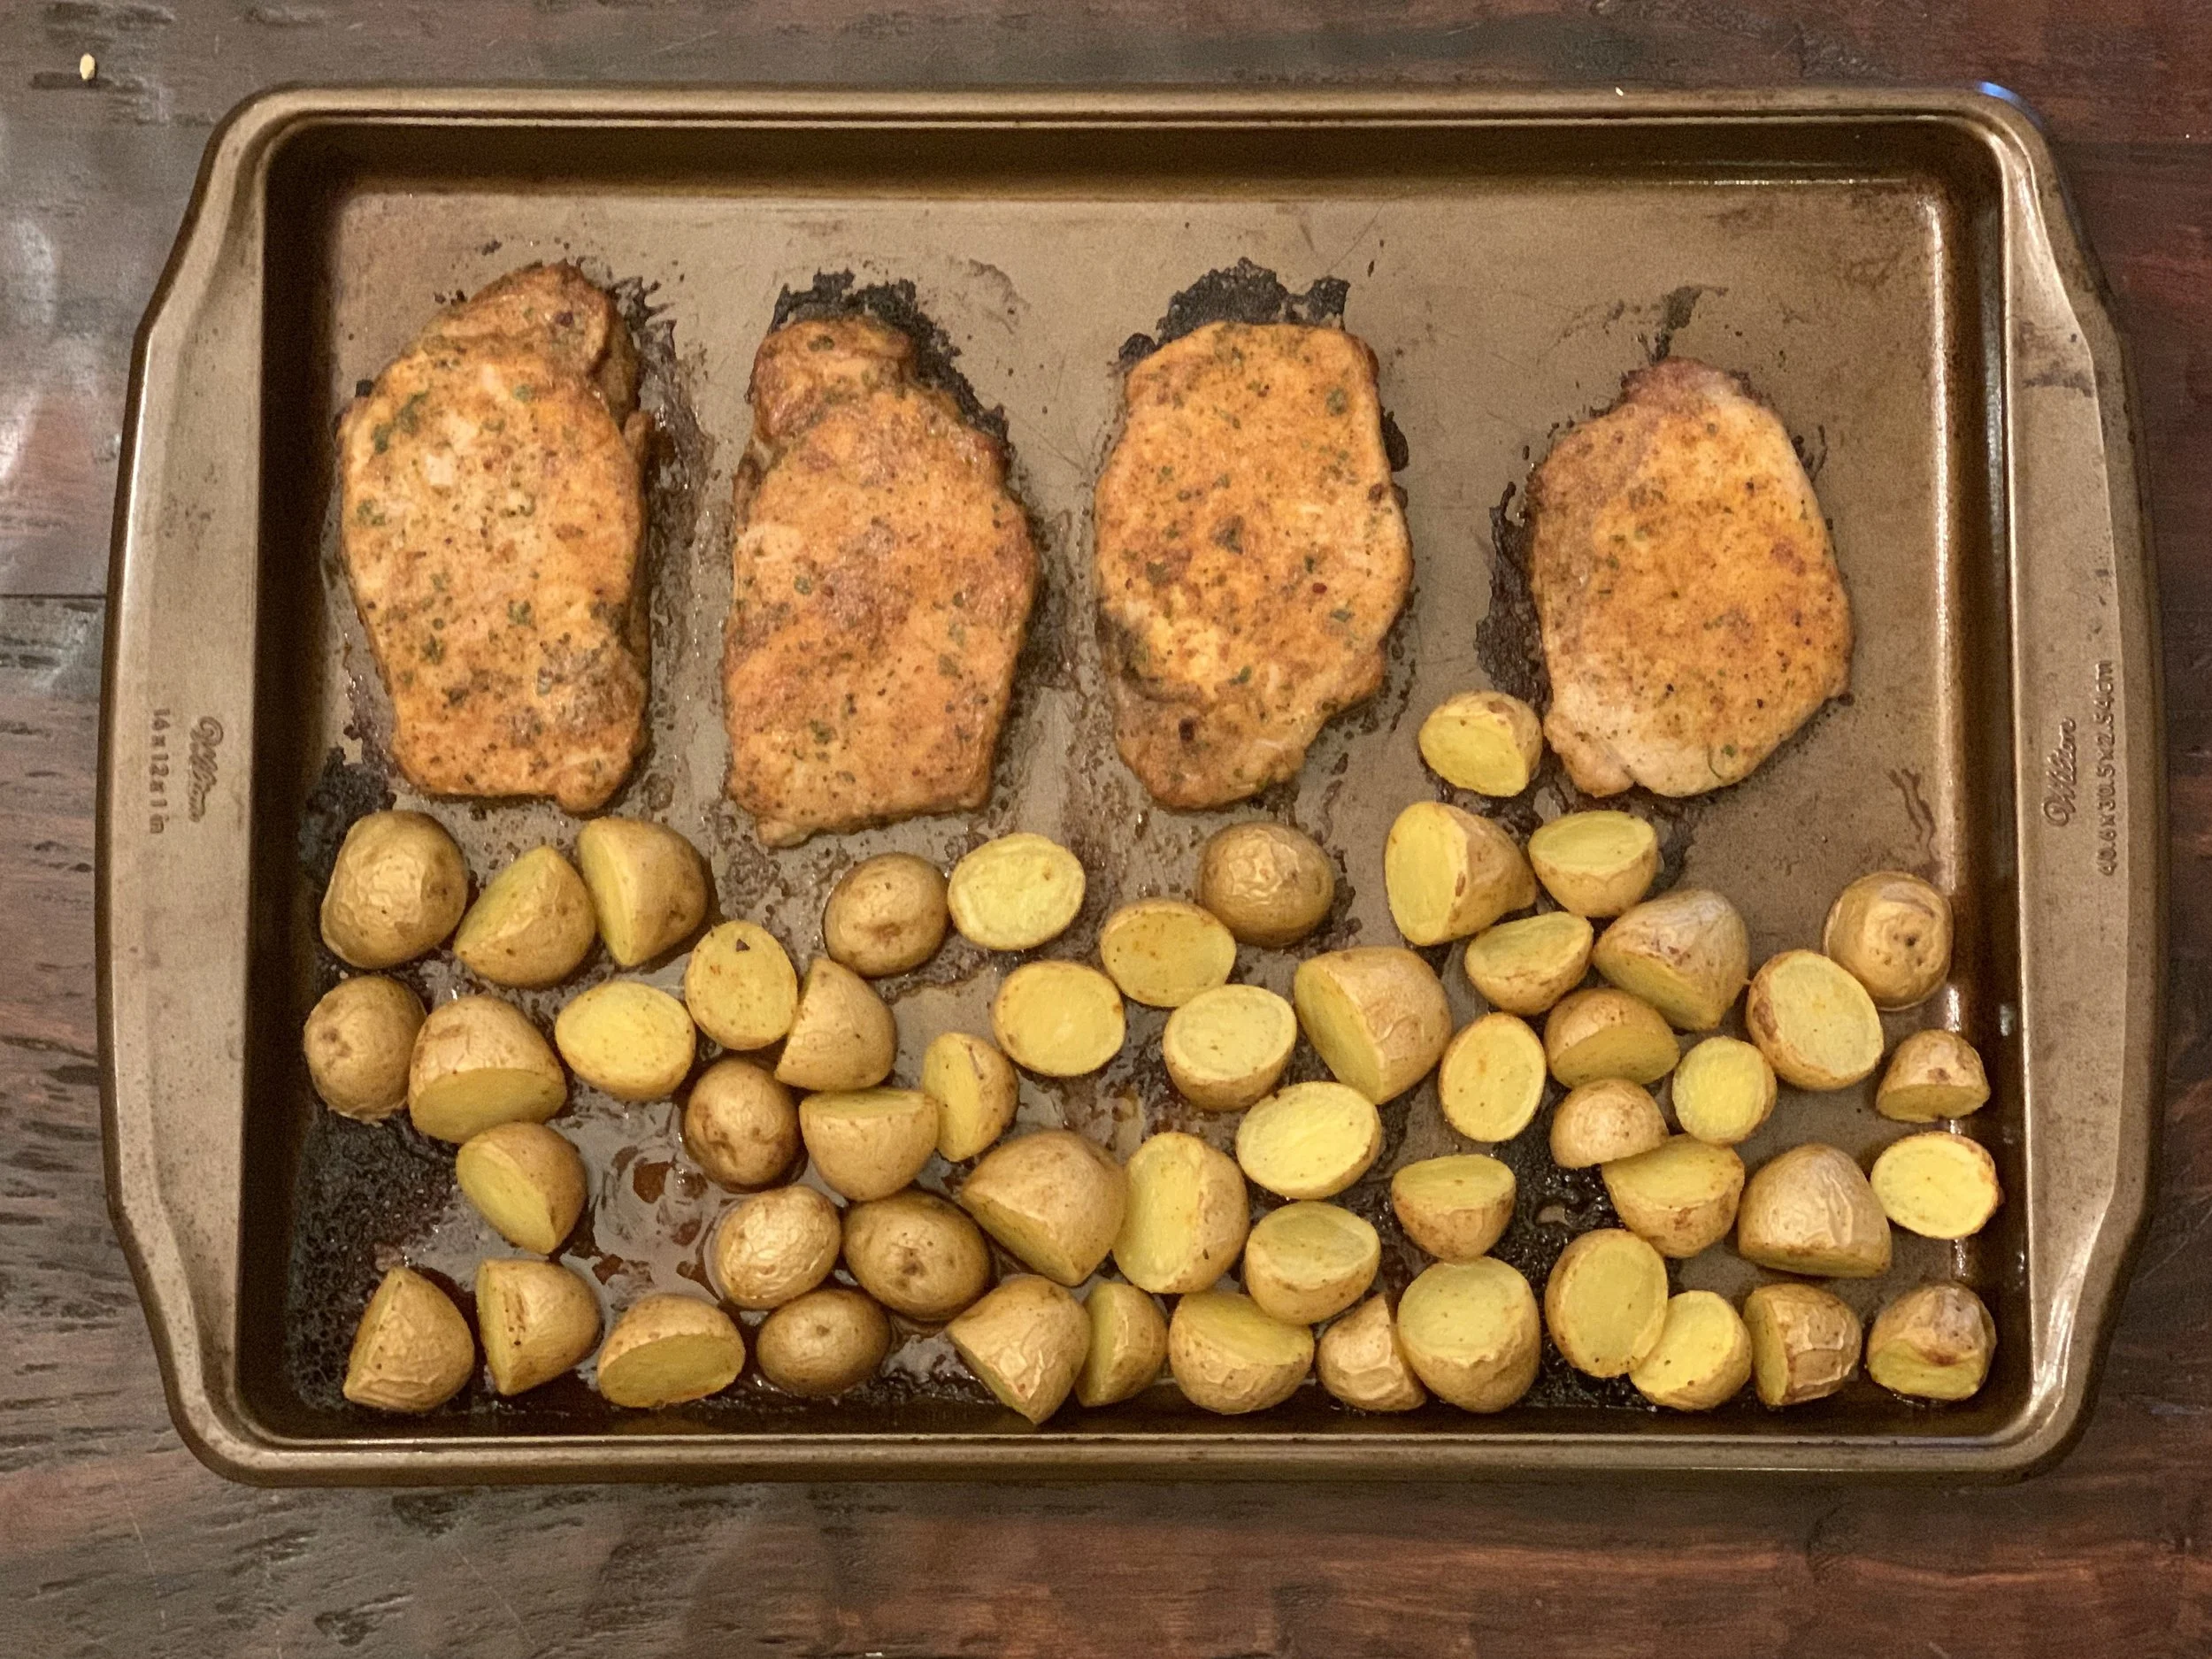
IMG_4274.jpg

The only photo I managed to take was of the finished product. Why? Because it smelt that good coming out of the oven, I knew I had missed an opportunity and wanted to atlas have proof of the sheet pan.

The ingredients are simple:

  • 4-5 boneless, not-to-thick, not-to-thin pork chops

  • 1 pound of yellow potatoes (or any preferred small potato variety)

  • Olive oil

  • Ranch seasoning packet

  • 1 Tbsp Mike’s All Purpose Seasoning **

IMG_4452.jpg

Let me introduce you to Mike’s All Purpose Seasoning- It is made in Crystal Springs, Mississippi and found at Kroger (and I am sure in other places), but that is where I met Mike’s cousin who was demoing the product near the meat aisle.

You know what I am talking about, the product displays where you get a sample and a coupon and go about your business. Well, Mike’s cousin was more than a sample shoveler; he was a passionate promoter of the product and had the biggest smile. Not to mention, he had all kinds of goodies made up with the seasoning, I just had to buy a bottle.

In fairness, that bottle sat in my cabinet for longer than I care to admit. I had good intentions on using it soon after I bought it, but just never got around to it. Well, in comes this recipe and the original called for paprika, I was out of paprika and became pouty. I caught this bottle sitting at the back of my cabinet and decided to give it a try. The rest is history!

I look forward to learning more about Mike’s story and sharing it with you, for now, I encourage you to find it at your local Kroger, or online and give it a try. I’m happy to provide him with free advertisement.

The instructions for the sheet pan pork chops and potatoes are as easy as the ingredient list.

Wash and cut the potatoes in half (they cook faster).

In a small bowl add 1-2 tablespoons of olive oil.

In another small bowl, mix in the ranch seasoning packet and Mike’s All Purpose Seasoning.

Next, take your pork chops and lightly cover both sides with olive oil, and then cover it in the seasoning mix and repeat with all the chops. Assemble seasoned chops on the sheet pan.

You may need to add a touch more olive oil to your potatoes, but use the leftover seasoning mix and coat your vegetables, well. Don’t be alarmed the pork chops were rubbing around in there. It’s all cooking together.

Assemble the seasoned potatoes on the other side of the sheet pan.

Place your sheet pan into the oven and bake at 400 degrees for 15-20 minutes.

You know it’s done when the potatoes are soft, and the pork chop is at minimum 145 on the inside. They will continue to cook once you remove it from the heat. Learning to take them out of the oven or off grill 5-10 degrees below ideal temperature (which is 155 for pork) will make a world of difference in tenderness!

Feel free to recheck the temp 5-10 minutes after removing it from the oven, to prove to yourself that it rose another 5-10 degrees on the inside.

Complete this sheet pan meal with a side salad or other vegetable and dinner is served.

It turned out delicious!

Summer Pasta Salad

Summer is the best time of year for all things salads! You can easily get overwhelmed with all the salad potential that comes with the summer harvest — so many vegetable combinations, so little time. And if you aren’t expanding past your sad salads of the same lettuce, a few standard vegetables, and sensible dressing, you are truly missing out.

Salads can be so much more than toppings on a bed of lettuce. Summer is the perfect time to keep a different one in the refrigerator each week to enjoy. This pasta summer salad can be a meal in itself or a light side to other summer favorites: backyard grilled meats, fresh fish or seafood.

IMG_4210.jpg

Don’t take these ingredients as the gospel, feel free to substitute your favorites, add more, take away, or whatever makes you happy. If you don’t like bowtie pasta, choose a different type. Stick with chickpeas (in my opinion) as they hold up to the dressing and store in the refrigerator without getting soggy. Plus, they add a boost of protein if you decide to eat this alone.

In this go-round, I used bell pepper, cucumber, cherry tomatoes.

The rest of the ingredients shown are for the dressing — an avocado, lemon, garlic, basil, and dijon mustard, with salt and pepper.

IMG_4211.jpg

Pro tip: seed your cucumber to help keep your salad from getting soggy. You don’t have to take this extra step, but you will notice a quality difference after a day or so in the refrigerator. The cucumber seeds quickly spoon out.

IMG_4212.jpg
  • You’ll want about 2-3 cups of cooked pasta.

  • Cook and drain pasta.

  • Drain and rinse your can of chickpeas.

  • Chop your vegetables.

  • Add them all to a big bowl and salt and pepper to taste.

IMG_4215.jpg

In a food processor, prepare the dressing.

  • Add in a 1/2 cup of chopped, fresh basil.

  • *A fresh avocado (peeled).

  • The juice of a lemon.

  • A tablespoon of minced garlic (or 2 fresh cloves).

  • A generous tablespoon of Dijon mustard.

  • Process till smooth.

  • Then add up to 1/4 cup water and process again.

*My avocado was not ripe enough and I ended up wasting a lot while peeling it. Since the avocado provides the creaminess, you desire in dressing. I added one teaspoon of olive oil. If you can’t find a fresh and ripe avocado, forgo it and look in your grocery for the prepared guacamole (It is already super smooth) and sub about 1/2 cup or one of the small guacamole containers.

IMG_4217.jpg

Combine the dressing and the vegetables whit he pasta and chickpeas.

IMG_4220.jpg

Yo! That is one pretty salad! It is light, yet filling. It is full of protein and fiber. It will be a big hit at your cookouts, and with your family. Seal it tight and it will last several days in your refrigerator. Best served chilled.